
OpenLayers加载天地图2018
2018最新OpenLayers天地图加载可行方案,天地图WMTS调用,OpenLayers 天地图 WMTS GetCapabilities GetTile
最近要了解Web GIS方面的知识,对我这些外行人来说比较吃力,用OpenLayers加载天地图也遇到了小打击,一番折腾,终于做到仅仅显示了,把过程简单记录下:
首先是百度一轮,看了不少博客,感觉差不多后,自己动手就是不成功,继续摸索后勉强算把地图加载出来了,下面是我的基本过程:
1、天地图现在要注册才能用,以前应该不用注册(网上的代码以前写的,我使用不成功)
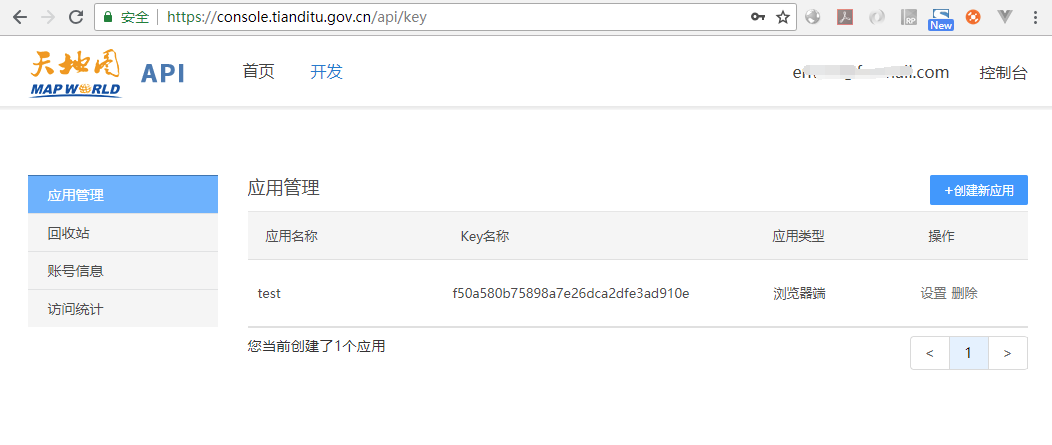
我到 http://www.tianditu.gov.cn/ 注册登录后,在 https://console.tianditu.gov.cn/api/key 创建一个应用,如图:
接着到 http://lbs.tianditu.gov.cn/server/MapService.html 可看到提供的WMTS接口列表,如图:
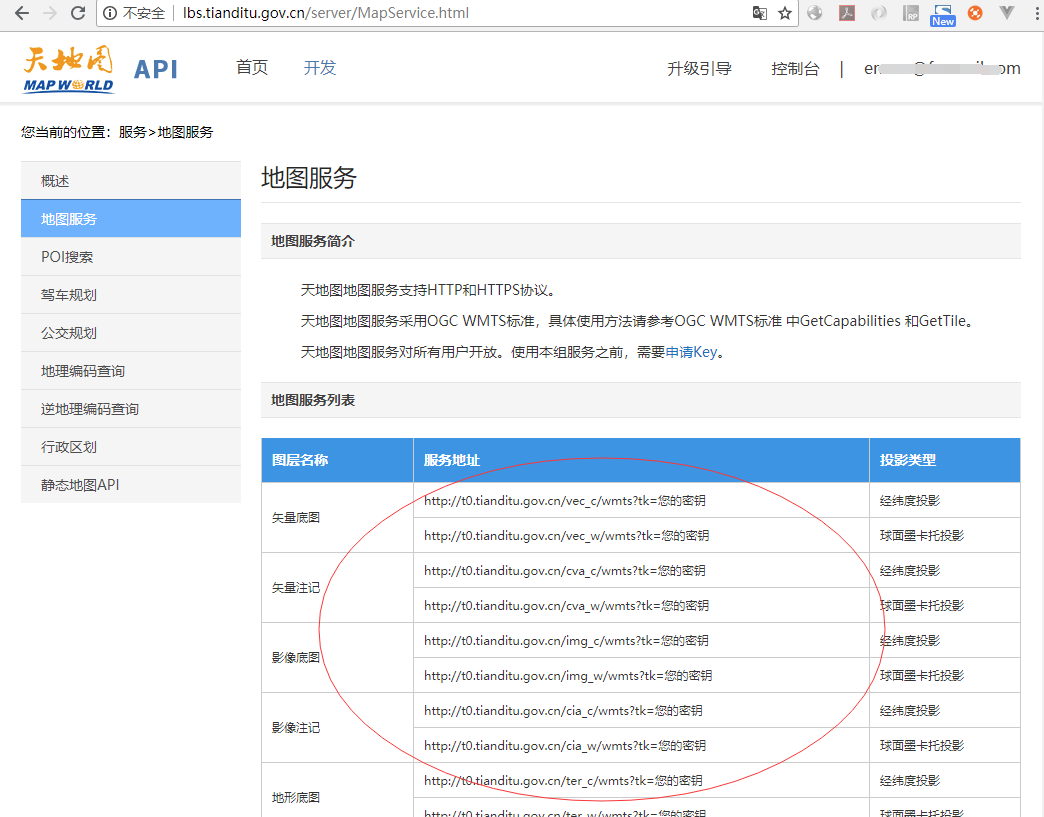
到这里,已经有WMTS的链接了,接着就使用OpenLayers来调用这个WMTS的链接来显示地图。
2、编写OpenLayers调用WMTS服务来显示地图的代码(我的做法是到官网复制相关Demo的代码,然后修改)
官网有一个Demo比较类似,链接:http://openlayers.org/en/latest/examples/wmts.html,如图:

在Demo代码的基础上,我调整后能成功显示的代码如下(可能有些多余的代码):
(文件 index.html 代码)
<!DOCTYPE html>
<html>
  <head>
    <meta charset="utf-8">
    <title>Using Parcel with OpenLayers</title>
    <style>
	  html,body{ padding:0; margin: 0; }
      .map {
        width: 600px;
        height: 400px;
		float:left;
		margin: 10px 0 0 10px;
      }
    </style>
  </head>
  <body>
    <div id="map1" class="map"></div>
    <script src="./index.js"></script>
  </body>
</html>
(文件 index.js 代码)
import Map from 'ol/Map.js';
import View from 'ol/View.js';
import {defaults as defaultControls} from 'ol/control.js';
import {getWidth, getTopLeft} from 'ol/extent.js';
import TileLayer from 'ol/layer/Tile.js';
import {get as getProjection} from 'ol/proj.js';
import OSM from 'ol/source/OSM.js';
import WMTS from 'ol/source/WMTS.js';
import WMTSTileGrid from 'ol/tilegrid/WMTS.js';
var projection = getProjection('EPSG:3857');
var projectionExtent = projection.getExtent();
var size = getWidth(projectionExtent) / 256;
var resolutions = new Array(18);
var matrixIds = new Array(18);
for (var z = 1; z < 19; ++z) {
// generate resolutions and matrixIds arrays for this WMTS
resolutions[z] = size / Math.pow(2, z);
matrixIds[z] = z;
}
var webKey = 'f50a580b75898a7e26dca2dfe3ad910e';
var wmtsUrl_1 = 'http://t{0-7}.tianditu.gov.cn/vec_w/wmts?tk='; //矢量底图
var wmtsUrl_2 = 'http://t{0-7}.tianditu.gov.cn/cva_w/wmts?tk='; //矢量注记
var wmtsUrl_3 = 'http://t{0-7}.tianditu.gov.cn/img_w/wmts?tk='; //影像底图
var wmtsUrl_4 = 'http://t{0-7}.tianditu.gov.cn/cia_w/wmts?tk='; //影像注记
var wmtsUrl_5 = 'http://t{0-7}.tianditu.gov.cn/ter_w/wmts?tk='; //地形底图
var wmtsUrl_6 = 'http://t{0-7}.tianditu.gov.cn/cta_w/wmts?tk='; //地形注记
var wmtsUrl_7 = 'http://t{0-7}.tianditu.gov.cn/ibo_w/wmts?tk='; //境界(省级以上)
var wmtsUrl_8 = 'http://t{0-7}.tianditu.gov.cn/eva_w/wmts?tk='; //矢量英文注记
var wmtsUrl_9 = 'http://t{0-7}.tianditu.gov.cn/eia_w/wmts?tk='; //影像英文注记
var map1 = new Map({
layers: [
new TileLayer({
opacity: 0.7,
source: new WMTS({
url: wmtsUrl_1 + webKey,
layer: 'vec',
matrixSet: 'w',
format: 'tiles',
style: 'default',
projection: projection,
tileGrid: new WMTSTileGrid({
origin: getTopLeft(projectionExtent),
resolutions: resolutions,
matrixIds: matrixIds
}),
wrapX: true
})
}),
new TileLayer({
opacity: 0.7,
source: new WMTS({
url: wmtsUrl_2 + webKey,
layer: 'cva',
matrixSet: 'w',
format: 'tiles',
style: 'default',
projection: projection,
tileGrid: new WMTSTileGrid({
origin: getTopLeft(projectionExtent),
resolutions: resolutions,
matrixIds: matrixIds
}),
wrapX: true
})
})
],
target: 'map1',
view: new View({
center: [-11158582, 4813697],
zoom: 4
})
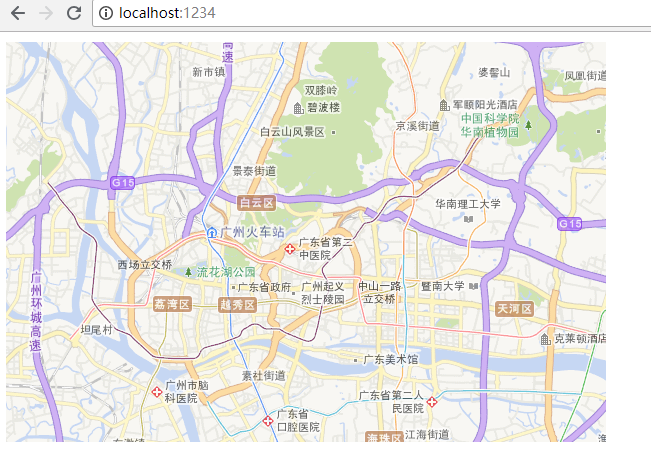
});效果显示如图:
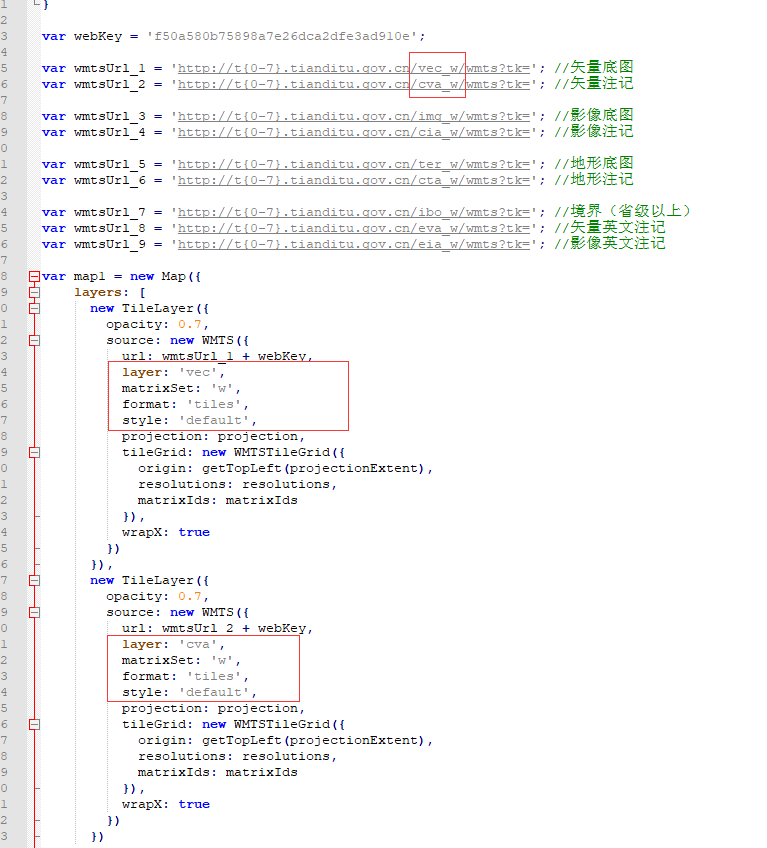
3、代码中有些关键的参数,导致我开始一直不成功,下面简单说明一下代码
主要是“source”里面的“layer、matrixSet、format、style”这几个参数,
这几个参数不能乱写,得由WMTS的GetCapabilities接口返回的结果来决定,
你也可以百度下“WMTS GetCapabilities”了解更多!
代码中这几个参数,如图:
怎么决定的?先看下天地图的 http://t0.tianditu.gov.cn/vec_w/wmts?request=GetCapabilities&service=wmts ,如图:

4、天地图有好几份底图数据,我为了看看效果,把它都显示了一下
目前天地图有这些WMTS服务接口,如图:
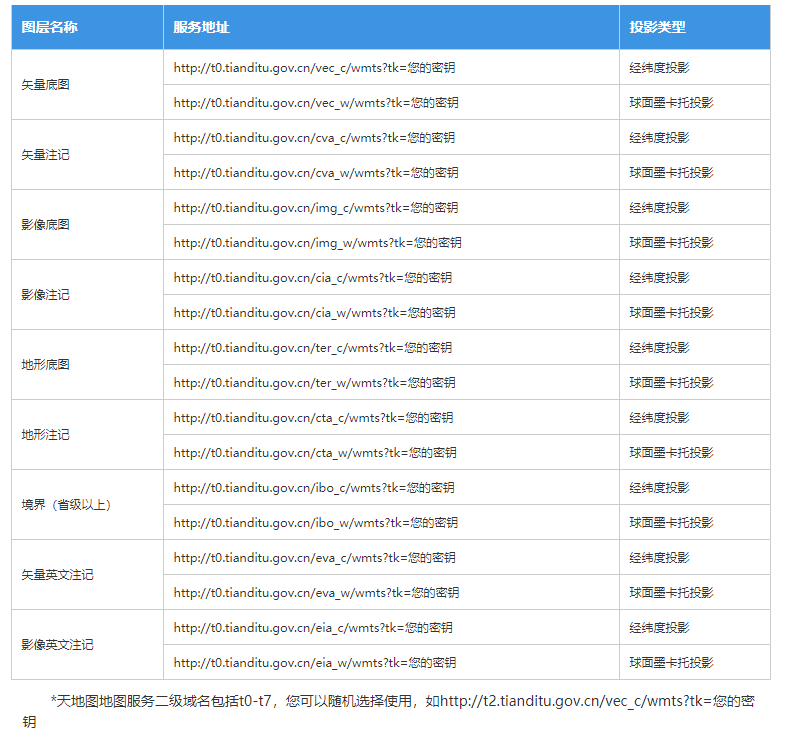
下面我都用OpenLayers调用看看效果呗,如图:

参考:(看了比较多博客,参考了哪些文章,没记录下来,比较杂。。。)
(完)
转载自:https://blog.csdn.net/envon123/article/details/82706185


