Jetty环境下Geoserver跨域
1. Download the matched version of theJetty servlets according to your jetty version from this page Jetty
Servlets .
2.
In this example i’m using jetty v7.6.13.v20130916 so the jar file should benamed
(jetty-servlets-7.6.13.v20130916.jar) the filename willbe different according to the jetty version – don’t change its name becausejetty matching the servlet name with its version like :
jetty-servlets-<%JETTY_VERSION%>.jar, so don’t rename it.
3.
Stop the (GeoServer, Postgres) servicesand Take a copy from the OpenGeo directory located in
(C:\Program Files (x86)\boundless\OpenGeo) and alsoCopy the OpenGeo directory located in
(C:\ProgramData\boundless\OpenGeo) before startingthis tutorial, as a precaution step.
4.
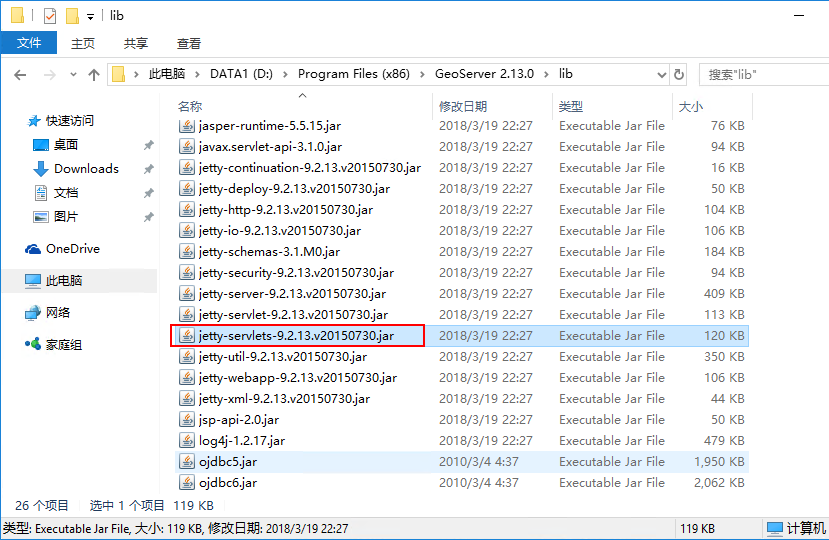
Copy the file (jetty-servlets-7.6.13.v20130916.jar) (As-is) into thejetty Lib directory
(*C:\Program Files (x86)\boundless\OpenGeo\jetty\lib*)also the directory may change according your installation directory.
5. Copy and paste the following xml linesinto the (webdefault.xml) located in
(C:\Program Files (x86)\boundless\OpenGeo\jetty\ect\webdefault.xml),i’m not sure that the location for these lines to place in the file isimportant or not but i paste them starting from line #306 after </serlet-mapping>
<filter>
 <filter-name>cross-origin</filter-name>
<filter-class>org.eclipse.jetty.servlets.CrossOriginFilter</filter-class>
</filter>
<filter-mapping>
 <filter-name>cross-origin</filter-name>
 <url-pattern>/*</url-pattern>
</filter-mapping>
6.
Start the (GeoServer, Postgres) services, wait for a few seconds andbrowse to the geoserver page, the geoserver will start correctly.
转载自:https://blog.csdn.net/kangming310/article/details/50564046