基于python实现geoserver修改样式
目录
目录
参考Geoserver官网的REST API使用教程:https://docs.geoserver.org/stable/en/user/rest/index.html
1、创建样式
法一:通过上传包含样式内容的ZIP,在一个步骤中将样式添加到服务器。
在服务器上创建新样式,并在其中填充本地SLD文件的内容以及SLD包中提供的相关图像。SLD包是一个zip文件,包含SLD样式和SLD中使用的相关图像文件。
# 新样式sld包的路径
mysldzip_address='C:/Users/abcd/Desktop/china-latest-free.shp/buildingmark.zip'
# 上传样式
os.system('curl -u admin:geoserver -X POST -H "Content-type: application/zip" --data-binary @'+mysldzip_address+' http://localhost:8081/geoserver/rest/styles')

法二:创建分两步完成:在目录中创建样式条目,然后上传样式内容。
# 新样式名称
style_name = 'building_style'
# 样式地址
mysld_address = 'C:/Users/abcd/Desktop/china-latest-free.shp/buildingmark.sld'

# 创建样式
os.system('curl -u admin:geoserver -X POST -H "Content-type: text/xml" -d "<style><name>' + style_name + '</name><filename>' + style_name + '</filename></style>" http://localhost:8081/geoserver/rest/styles')

# 上传样式
os.system('curl -u admin:geoserver -X PUT -H "Content-type: application/vnd.ogc.sld+xml" -d @' + mysld_address + ' http://localhost:8081/geoserver/rest/styles/' + style_name)
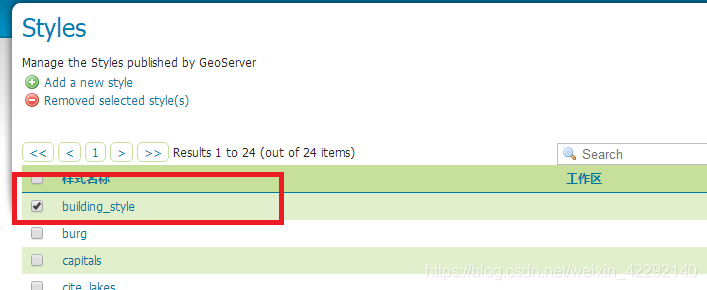

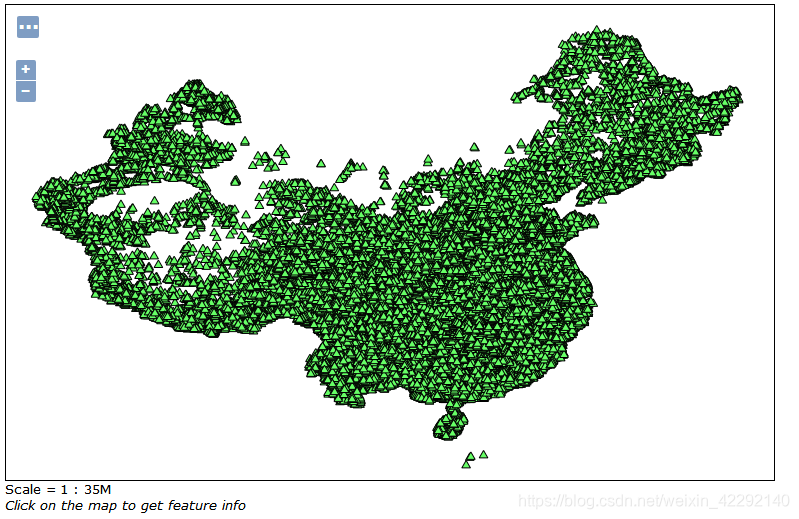
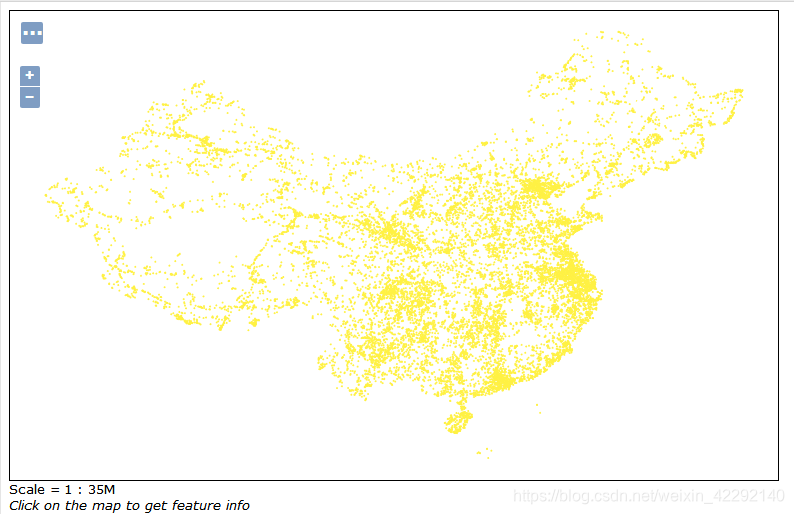
2、样式应用于图层
将现有‘polygon_yellow’样式应用于创建的图层china:gis_osm_buildings_a_free_1(此操作不会覆盖整个图层定义,而是更新它)应用的图层记得相应修改。
# 图层样式名称
style_name = 'polygon_yellow'
# 修改点样式
os.system('curl -u admin:geoserver -X PUT -H "Content-type: text/xml" -d "<layer><defaultStyle><name>' + style_name + '</name></defaultStyle><enabled>true</enabled></layer>" http://localhost:8081/geoserver/rest/layers/china:gis_osm_buildings_a_free_1')

转载自:https://blog.csdn.net/weixin_42292140/article/details/87740927