ms4w+tilecache+openlayers配置xuhy总结
参考http://opengeo.cn/bbs/simple/index.php?t64.html
1. 安装ms4w,保证apache正常运行
2. 安装python2.5 我的也是arcgis自带了的,严重怀疑我自己下的python2.5安装程序有问题,今天在办公室整了一天都没有头绪,当然办公室是win7
3. 安装mod_python-3.3.1.win32-py2.5-Apache2.2.exe
4. 解压tilecache-2.11.zip到C:\ms4w\apps,这个目录中最好不要有program files这样的中间有空格的目录
5. 打开Apache的conf\ httpd.conf文件,在#LoadModule后添加
LoadModule python_module modules/mod_python.so
还是在conf\ httpd.conf文件中,在
<Directory />
Options FollowSymLinks
AllowOverride None
Order deny,allow
Deny from all
</Directory>
下添加
Alias /tilecache/ “C:/ms4w/apps/tilecache-2.11/”
<Directory”C:/ms4w/apps/tilecache-2.11/”>
AddHandlerpython-program .py
PythonHandlerTileCache.Service
PythonOptionTileCacheConfig C:/ms4w/apps/tilecache-2.11/tilecache.cfg
PythonDebug On
Allow from all
</Directory>
AddHandlercgi-script .cgi .pl
AddHandlermod_python .py
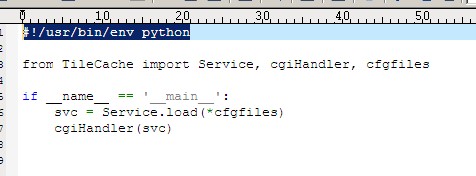
6. C:/tilecache-2.10/目录下的tilecache.cgi文件,将第一行改成#!C:\Python25\python.exe –u
本来是(这个在openlayers的ProxyHost中也有用,并且必须将文件另存为unicode-ascii编码格式,害得大爷我研究了一个晚上)

改成如下
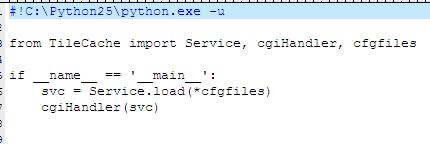

之后将tilecache.cgi文件的后缀改为.py,也就是使其转变成tilecache.py文件
7. 修改C:/tilecache-2.10/目录下的tilecache.cfg文件,修改位置为
[cache]
type=Disk
base=C:/tilecache-2.10/tmp/tilecache
其中的base指存储地图瓦片的目录
修改后内容为:
# Configurationfor MC TileCache
# TileCache canload Layers or Caches from anywhere in sys.path. If you
# prefer to loadfrom somewhere which is *not* on sys.path, you can use
# the pathconfiguration paramter to set a comma-seperated list of
# filesystempaths which you want prepended to sys.path.
#[tilecache_options]
#path=/home/you
# Some TileCacheoptions are controlled by metadata. One example is the
#crossdomain_sites option, which allows you to add sites which are then
# included in acrossdomain.xml file served from the root of the TileCache
#[metadata]
#crossdomain_sites=openstreetmap.org,openaerialmap.org
# [cache]section examples: (mandatory!)
#
# Disk:
# [cache]
# type=Disk (works out of the box)
# base=<fullpath to cache directory>
#
# Memcached:
# [cache]
#type=Memcached (you’ll need memcache.pyand memcached running!)
#servers=192.168.1.1:11211
#
# Amazon S3:
# [cache]
# type=AWSS3
#access_key=your_access_key
#secret_access_key=your_secret_access_key
[cache]
type=Disk
base=C:/ms4w/apps/tilecache-2.11/tmp/tilecache
# [layername] –all other sections are named layers
#
#type={MapServerLayer,WMSLayer}
# *** if you want to use MapServerLayer, you*must* have Python mapscript
# installed and available ***
#
#mapfile=<full path to map file>
# url=<fullURL of WMS>
#layers=<layer>[,<layer2>,<layer3>,…]
# *** optionaliff layername if what
# yourdata source calls the layer **
#extension={png,jpeg,gif} ***defaults to “png” ***
#size=256,256 *** defaults to 256×256 ***
#bbox=-180.0,-90.0,180.0,90.0 ***defaults to world in lon/lat ***
#srs=EPSG:4326 ***defaults to EPSG:4326 ***
# levels=20 *** defaults to 20zoom levels ***
#resolutions=0.1,0.05,0.025,… ***defaults to global profile ***
#metaTile=true ***metatiling off by default
# requirespython-imaging ***
#metaSize=5,5 *** size of metatile in tiles
# defaultsto 5 x 5 ***
#metaBuffer=10 ***size of metatile buffer in px ***
#mime_type=image/png *** by default, themime type is image/extension ***
# *** but you may want toset extension=png8 for ***
# *** GeoServer WMS, andthis lets you set the ***
# *** mime_typeseperately. ***
# The followingis a demonstration of a layer which would be generated
# according tothe ‘Google projection’. This uses the standard values for
# a sphericalmercator projection for maxextent, maxresolution, units
# and srs.
# [google-tiles]
# type=WMS
# url=http://localhost/cgi-bin/mapserv?map=/mapdata/world.map
# layers=world
#spherical_mercator=true
# StandardMapServer layer configuration.
# [vmap0]
# type=MapServer
# layers=vmap0
#mapfile=/var/www/vmap0.map
# RenderingOpenStreetMap data with Mapnik; should use metaTiling to
# avoid labelsacross tile boundaries
# [osm]
# type=Mapnik
#mapfile=/home/user/osm-mapnik/osm.xml
#spherical_mercator=true
#tms_type=google
# metatile=yes
[basic]
type=WMS
url=http://labs.metacarta.com/wms/vmap0
extension=png
8. 配置环境变量,我的电脑—右键–属性–高级–环境变量–下边框的系统变量,先在path中添加上C:\Python25,然后再在pythonpath(大写)中添加C:\tilecache-2.10,确定确定
安装好python后,环境变量中自己就有PYTHONPATH,值为:
D:\Program Files\ArcGIS\bin;C:\ms4w\apps\tilecache-2.11
9. 最后,”运行”,输入”Regedit”,打开注册表编辑器,在注册表的[HKEY_LOCAL_MACHINE\SOFTWARE\Python\PythonCore\2.5\PythonPath]位置下的“默认”键值中添加TileCache的位置”C:\tilecache\”


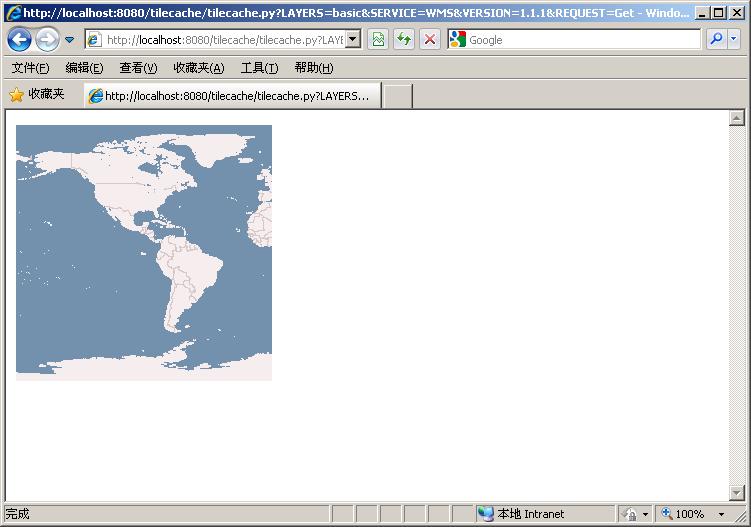
10. 测试结果:启动apache http server,输入:http://localhost:8080/tilecache/tilecache.py?LAYERS=basic&SERVICE=WMS&VERSION=1.1.1&REQUEST=GetMap&SRS=EPSG:4326&BBOX=-180,-90,0,90&WIDTH=256&HEIGHT=256,有图片显示,说明配置成功。
只需用改端口号即可,结果如下,是一个图片:

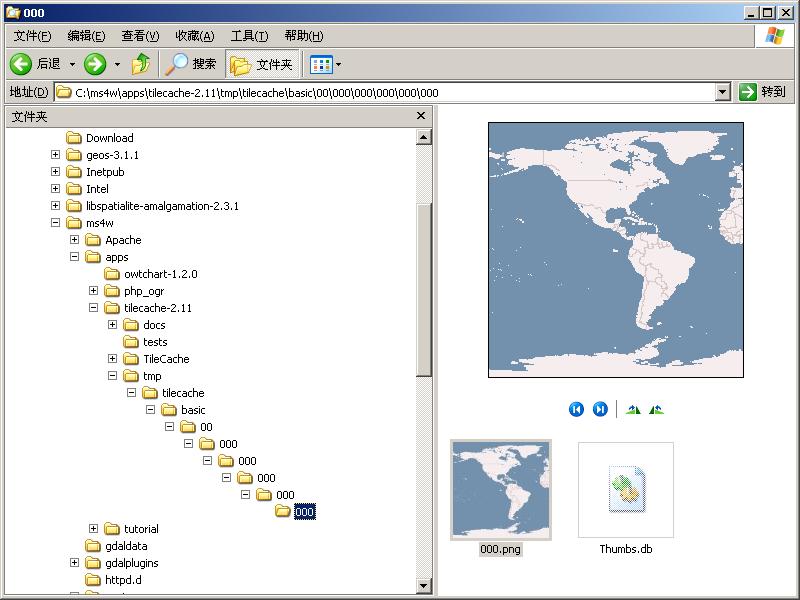
查看缓存内容如下:

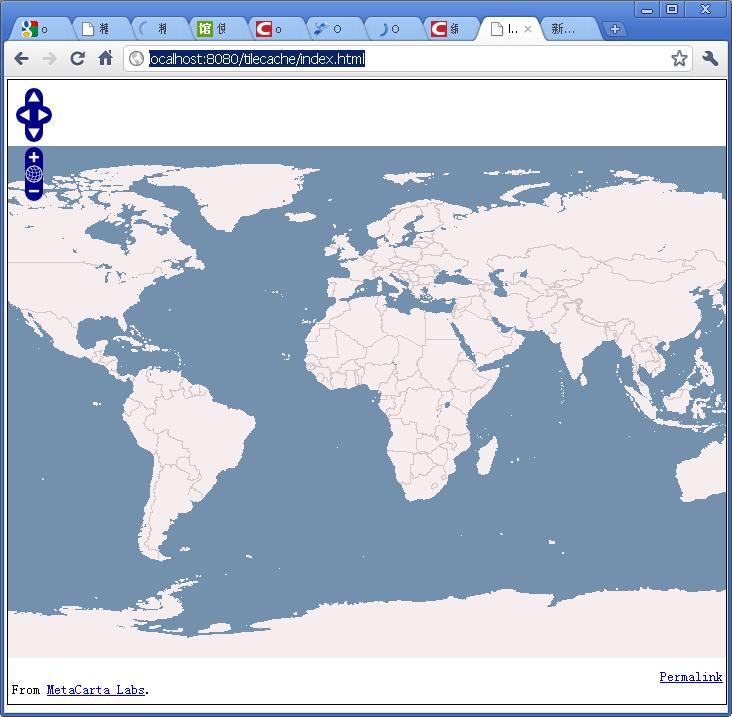
最后,修改tilecache目录下的index.html文件内容,只改一个后缀名,因为tilecache的后缀名被改为了py,所以相应改动如下:
layer = new OpenLayers.Layer.WMS( “VMap0”,
“tilecache.py?”, {layers: ‘basic’, format: ‘image/png’ } );
然后在浏览器访问 http://localhost:8080/tilecache/index.html
即可看到瓦片地图

在瓦片缓存目录下可以看到切片和目录结构如下


接下来配置tilecache.cfg,加入本地的postgis图层
转载自:https://blog.csdn.net/xuhaiyan8825/article/details/6929737