Eclipse Quickstart
Generate Eclipse project files with Maven
Generate the eclipse .project and .classpath files:
mvn eclipse:eclipse
Import modules into Eclipse
Run the Eclipse IDE
Open the Eclipse
PreferencesNavigate to
Java,Build Path,Classpath Variablesand clickNew...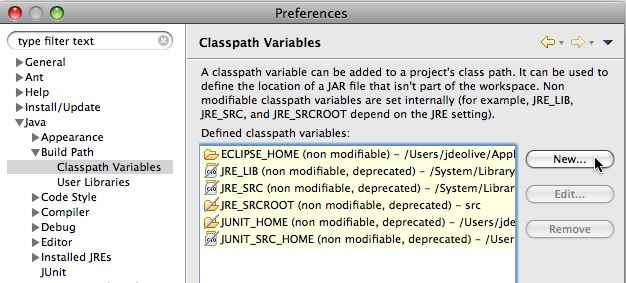
Create a classpath variable named “M2_REPO” and set the value to the location of the local Maven repository, and click
Ok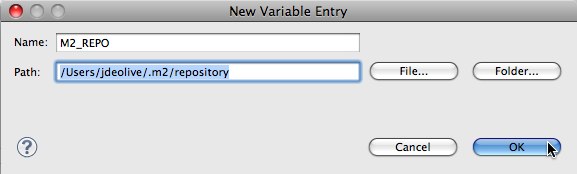
Click
Okto apply the new Eclipse preferencesRight-click in the
Package Explorerand clickImport...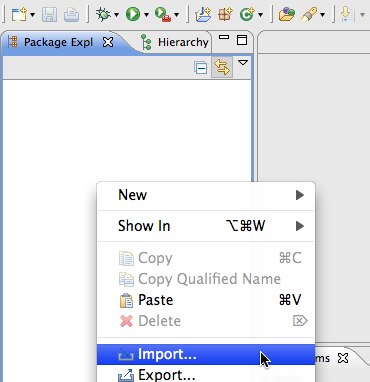
Select
Existing Projects into Workspaceand clickNext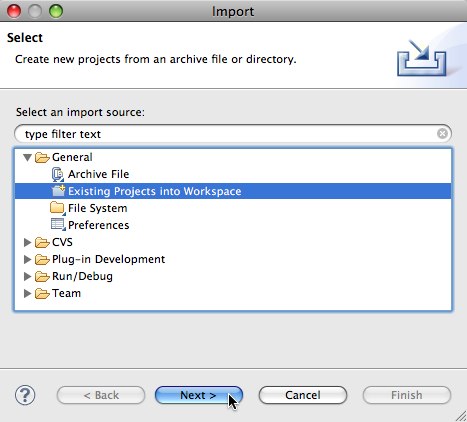
Navigate to the
geoserver/srcdirectoryEnsure all modules are selected and click
Finish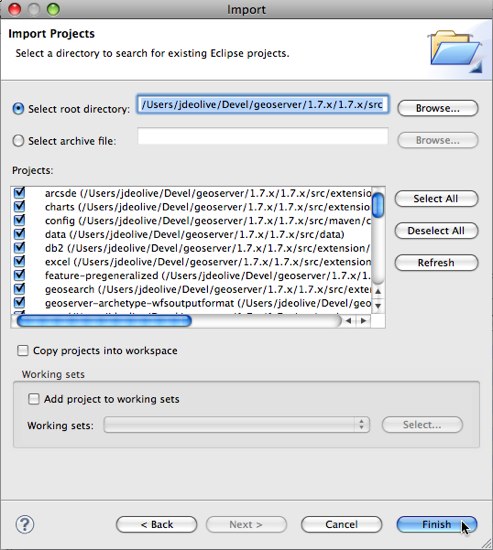
Run GeoServer from Eclipse
From the
Package Explorerselect theweb-appmoduleNavigate to the
org.geoserver.webpackageRight-click the
Startclass and navigate toRun as,Java Application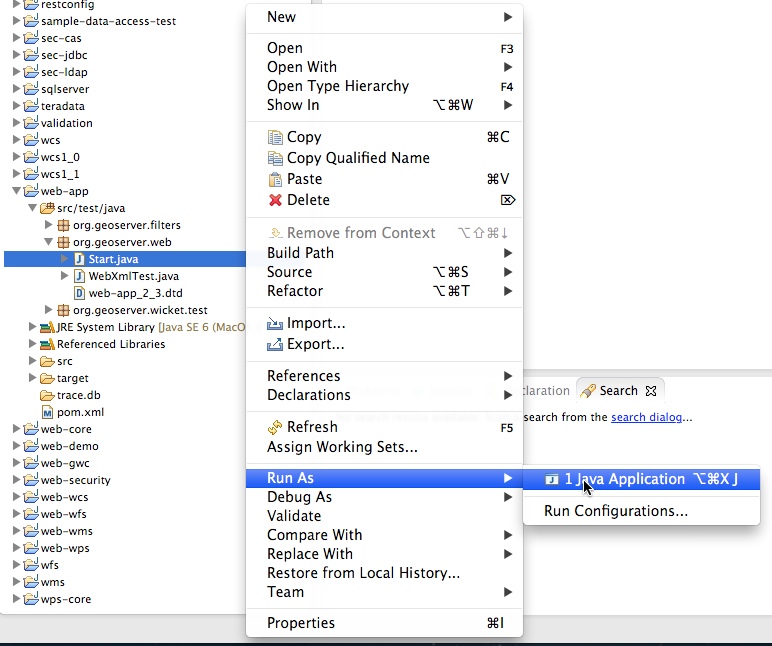
After running the first time you can return to the
Run Configurationsdialog to fine tune your launch environment (including setting a GEOSERVER_DATA_DIR).
Note
If you already have a server running on localhost:8080 see the Eclipse Guide for instructions on changing to a different port.
Run GeoServer with Extensions
The above instructions assume you want to run GeoServer without any extensions enabled. In cases where you do need certain extensions, the web-app module declares a number of profiles that will enable specific extensions when running Start. To enable an extension, re-generate the root eclipse profile with the appropriate maven profile(s) enabled:
% mvn eclipse:eclipse -P wps
The full list of supported profiles can be found in src/web/app/pom.xml.
Access GeoServer front page
- After a few seconds, GeoServer should be accessible at: http://localhost:8080/geoserver
- The default
adminpassword isgeoserver.