Linux(Ubuntu)下PostGIS+Postgresql的安装与配置(上)
我安装的版本是PostGIS2.2.4+Postgresql9.3.0
首先要保證有gcc的編譯环境,若是沒有可以從第一步開始,有的話請直接跳過:
1 安裝GCC編譯环境:在终端(ctrl+alt+T打开)输入:
$ sudo apt-get install build-essential2 安裝Postgresql
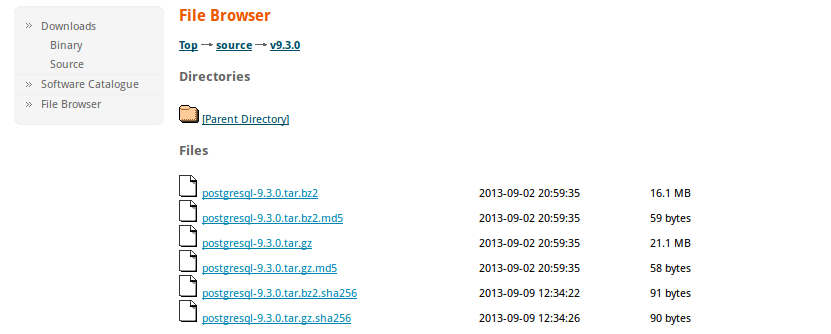
2.1 下載postgresql,地址为:https://www.postgresql.org/ftp/source/v9.3.0/
选择.tar.gz的那个
2.2 解压postgresql-9.3.0.tar.gz:在终端输入:(我这里是直接下载到download里边我就先进入了download文件目录:
$ cd /home/bulletproof/download
//会直接解压到download目录下边
$ sudo tar zxvf postgresql-9.3.0.tar.gz
2.3 进入解压的文件目录:
$ cd postgresql-9.3.02.4 编译postgresql源码:(先进入到root模式下,sudo su)
2.4.1 设置安装目录(我是安装到/opt/下边)
# ./configure --profix=/opt/pgsql-9.3.02.4.2 编译postgresql源码
//#不用写
# make
2.4.3 安装postgresql
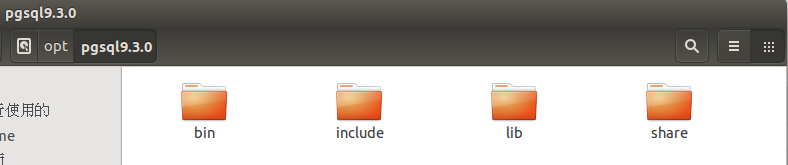
# make install这样,就安装成功了,可以看到安装目录下有下边一些文件夹:
3 创建postgres用户和修改密码以及一些常用命令:
//postgres用户创建:这里会提示你postgres用户已经有了,你可以创建一个新的,比如改为:useradd sea
# useradd postgres
//修改postgres用户的密码
# passwd postgres
//启动postgres实例
# pg_ctl start
//停止postgres实例
# pg_ctl stop
//创建数据库
# createdb test_db
//还可以在创建数据库时设置一些参数
# createdb -U username -T template_name test_db
//上边都是没有进入数据库的直接在终端进行的操作,可以进入指定的数据库,对数据库进行操作(SQL语言)
//进入某个数据库,默认为postgres
# psql test_db
4 设置postgresql开机自启动
4.1 进入postgresql源码目录中的contrib/start-scripts目录下(就是我们解压出来的那么目录)
# cd /home/bulletproof/download/postgresql-9.3.0/contrib/start-scripts/4.2 修改目录中的linux(为linux系统上的启动脚本)文件属性,添加X属性
#chmod a+x linux4.3 复制linux文件到/etc/init.d目录(linux初始化目录),并更名为postgresql
# cp linux /etc/init.d/postgresql4.4 修改postgresql文件
//打开文件
# gedit /etc/init.d/postgresql
//修改变量 找到文件中的prefix和PDATA变量,修改prefix为安装的路径,
//PDATA为存放数据的路径
prefix=/opt/pgsql-9.3.0
PDATA=/opt/pgsql-9.3.0/data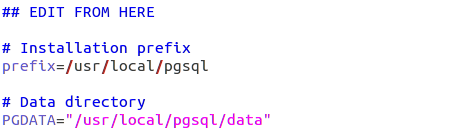
4.5 执行service postgresql start,启动服务
//开启服务
# service postgresql start
//关闭服务
# service postgresql stop
4.6 设置开机自启动
chkconfig --add postgresql到这里总算安装和配置好了postgresql,其他的配置就看大家的需求来自行配置了,下边一篇会写PostGIS的安装和配置,有不对的地发大家请指出来啊
转载自:https://blog.csdn.net/u011037214/article/details/53540626