SeoServer ——-Quickstart
目录
A step by step guide describing how to quickly get up and running with a GeoServer development environment. This guide assumes that all the necessary
Tools are installed.
Note
This guide is designed to get developers up and running as quick as possible. For a more comprehensive guide see the
Maven Guide and the
Eclipse Guide.
Check out source code
Check out the source code from the subversion repository. Choose
trunk for the latest development, or a stable branch for versions less likely to change often.
Either:
svn co https://svn.codehaus.org/geoserver/trunk geoserver-trunk
Or (stable 1.7.x branch):
svn co https://svn.codehaus.org/geoserver/branches/1.7.x geoserver-1.7.x
In this example we will pretend that you checked the source out into a directory called
geoserver, but a more descriptive name is recommended.
Build with Maven
Change directory to the root of the source tree and execute the maven build command:
cd geoserver/src
mvn clean install
A successful build will result in something like the following output:
[INFO]
[INFO]
[INFO] ------------------------------------------------------------------------
[INFO] Reactor Summary:
[INFO] ------------------------------------------------------------------------
[INFO] GeoServer ............................................. SUCCESS [10.271s]
[INFO] GeoServer Maven Plugins ............................... SUCCESS [0.865s]
[INFO] Configuration Deployment PlugIn ....................... SUCCESS [3.820s]
[INFO] GeoServer Maven Archetypes ............................ SUCCESS [0.054s]
[INFO] GeoServer WFS Output Format Archetype ................. SUCCESS [0.390s]
[INFO] Core Platform Module .................................. SUCCESS [5.270s]
[INFO] Data Module ........................................... SUCCESS [4.521s]
[INFO] Open Web Service Module ............................... SUCCESS [2.730s]
[INFO] Main Module ........................................... SUCCESS [10.077s]
[INFO] Web Coverage Service Module ........................... SUCCESS [3.785s]
[INFO] Web Coverage Service 1.1.1 Module ..................... SUCCESS [5.254s]
[INFO] Validation Module ..................................... SUCCESS [1.131s]
[INFO] Web Feature Service Module ............................ SUCCESS [6.695s]
[INFO] Web Feature Service Module ............................ SUCCESS [1.197s]
[INFO] Web Map Service Module ................................ SUCCESS [8.519s]
[INFO] Geoserver REST Support Code ........................... SUCCESS [3.366s]
[INFO] GeoWebCache (GWC) Module .............................. SUCCESS [0.255s]
[INFO] Web Application Module ................................ SUCCESS [27.386s]
[INFO] Community Space ....................................... SUCCESS [0.312s]
[INFO] GeoServer Extensions .................................. SUCCESS [0.071s]
[INFO] ------------------------------------------------------------------------
[INFO] ------------------------------------------------------------------------
[INFO] BUILD SUCCESSFUL
[INFO] ------------------------------------------------------------------------
Generate Eclipse project files with Maven
Generate the eclipse .project and
.classpath files:
mvn eclipse:eclipse
Import modules into Eclipse
-
Run the Eclipse IDE
-
Open the Eclipse Preferences
-
Navigate to Java,
Build Path,
Classpath
Variables and click New...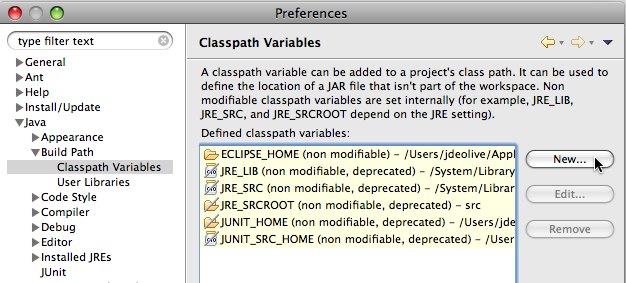
-
Create a classpath variable named “M2_REPO” and set the value to the location of the local Maven repository, and click
Ok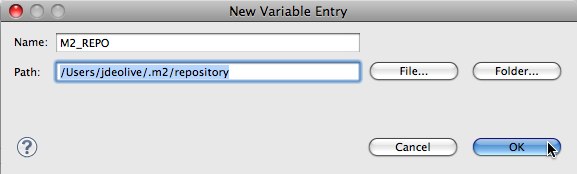
-
Click Ok to apply the new Eclipse preferences
-
Right-click in the Package
Explorer and click Import...
-
Select Existing
Projects into
Workspace and click Next
-
Navigate to the geoserver/src directory
-
Ensure all modules are selected and click
Finish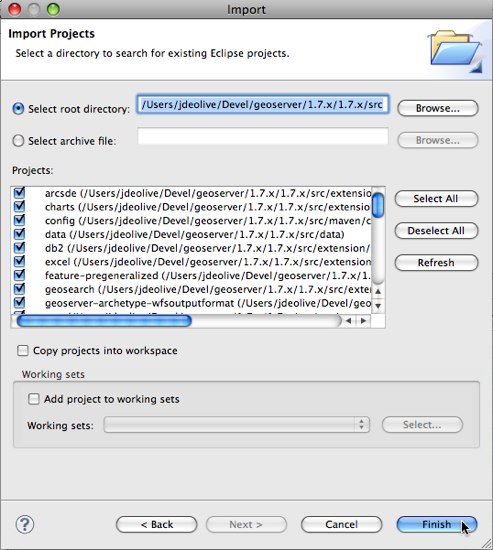
Run GeoServer from Eclipse
-
From the Package
Explorer select the web-app module (web in
1.7.x or earlier) -
Navigate to the org.geoserver.web package (org.vfny.geoserver.jetty in
1.7.x or earlier) -
Right-click the Start class and navigate to
Run as,
Java Application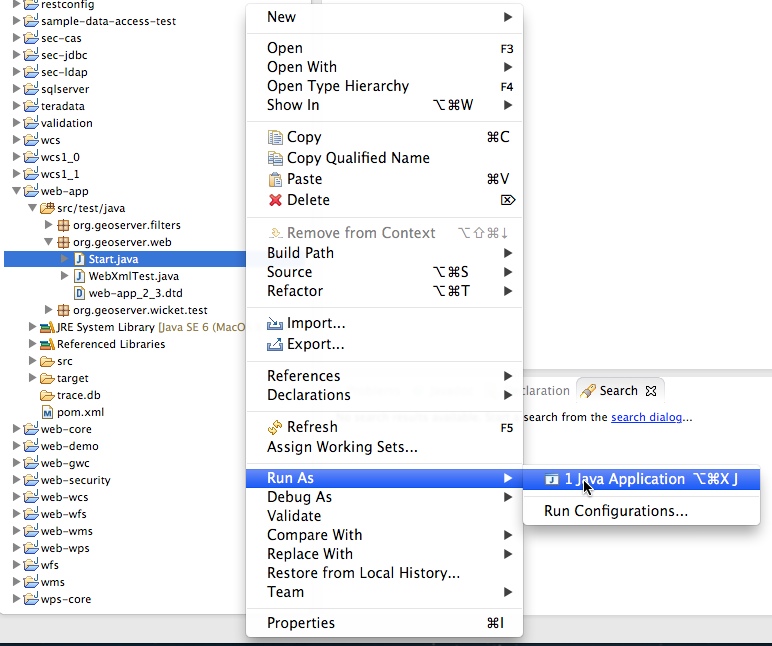
Access GeoServer front page
- After a few seconds, GeoServer should be accessible at:
http://localhost:8080/geoserver - The default admin password is
geoserver.
转载自:https://blog.csdn.net/hnzhangshilong/article/details/6822458