基于python实现geoserver发布shp
目录
目录
一、使用 REST 接口操作 Geoserver
Geoserver 拥有 rest 接口,实现在外部程序中对GeoServer进行管理操作、发布服务。rest 接口使用HTTP调用的方式,无需登录Web管理界面就可以对GeoServer进行简单的调用和配置。
Geoserver官网的REST API使用教程(CURL对rest接口的调用):https://docs.geoserver.org/stable/en/user/rest/index.html
二、基于python实现geoserver发布shp
1. 导入python所需的库
os 用来执行DOS指令,tkinter.filedialog 用来打开窗口选择路径。
import os
import tkinter.filedialog
2. 名称命名
# 工作空间命名
namespace = 'china'

# 数据存储名称
datastore_name = 'mychina'
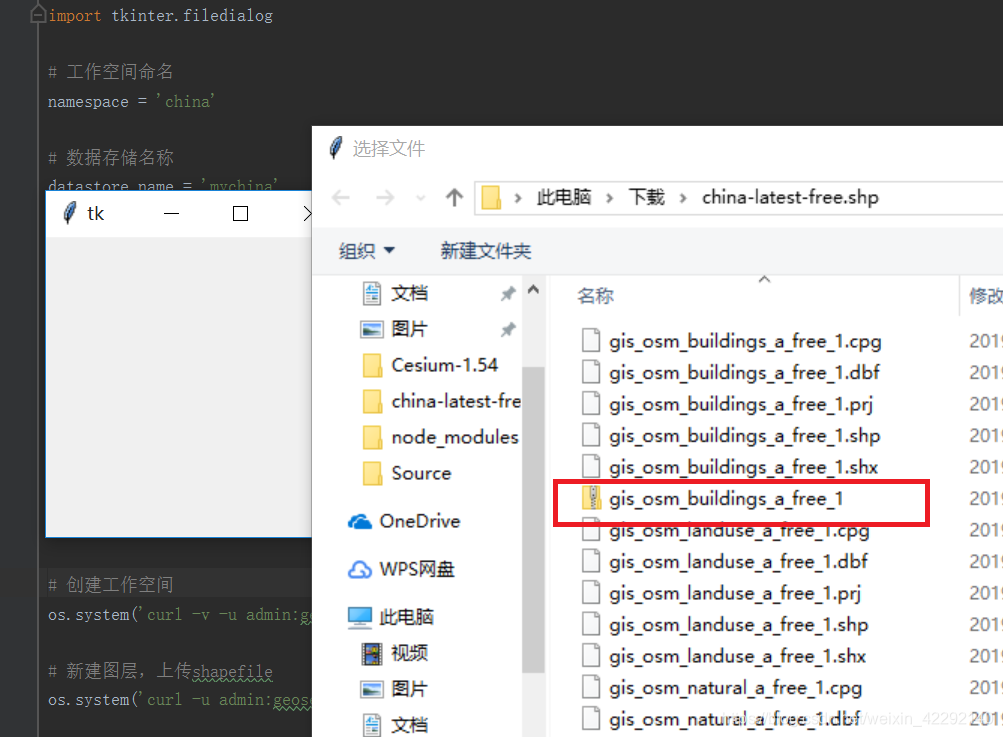
通过 tkinter.filedialog 打开弹窗,便于选择文件,从而获得文件路径和文件名。
# 文件对话框 默认打开路径
default_dir = r'文件路径'

# 文件路径
fpname = tkinter.filedialog.askopenfilename(title=u'选择文件', initialdir=(os.path.expanduser((default_dir))))

# 文件名称
fname = os.path.split(fpname)[-1]
3. 创建工作空间
workspaces通过Web界面转到该部分创建的新工作区,-u 表示验证的用户名和密码,-v 表示输入版本,-X 表示请求的方式,-H 表示输入的请求头信息
# 创建工作空间
os.system('curl -v -u admin:geoserver -X POST -H "Content-type: text/xml" -d "<workspace><name>' + namespace + '</name></workspace>" http://localhost:8081/geoserver/rest/workspaces')

4. 新建图层,上传shapefile
上传的shapefile必须要先打包成zip,注意打包时shapefile不能包含在文件夹中,就是说把shapefile的一系列文件选中后右键“添加到压缩文件…”而不是把shapefile放到文件夹中再压缩。
# 新建图层,上传shapefile
os.system('curl -u admin:geoserver -X PUT -H "Content-type: application/zip" --data-binary @' + fpname + ' http://localhost:8081/geoserver/rest/workspaces/' + namespace + '/datastores/' + datastore_name + '/file.shp')
运行python文件,弹出窗口,选择要上传的文件。(china-latest-free.shp.zip下载地址:https://blog.csdn.net/qq_912917507/article/details/81736041)

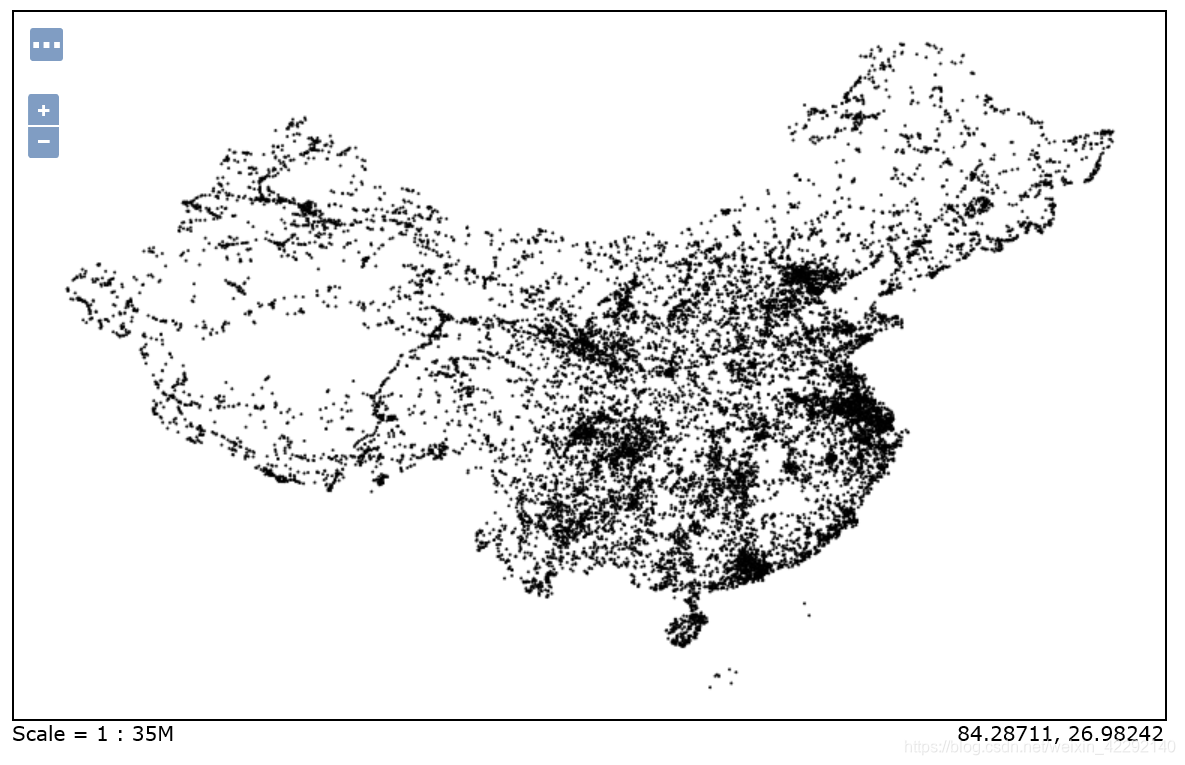
5.发布成功,图层展示
点击 Layer Preview>OpenLayers。
6. 遇到的问题已解决
运行python出现

- 下载curl(地址:ttps://curl.haxx.se/download.htmlhttps://curl.haxx.se/download.html 或者我已下在百度网盘链接: https://pan.baidu.com/s/1D3G-nCFfZZzdHAulqN3WpQ 提取码: x8zn )。
- 解压文件,将curl-7.61.1-win64-mingw\bin目录下 curl.exe 复制到C:\Windows\System32目录下即可。
转载自:https://blog.csdn.net/weixin_42292140/article/details/87718978