
Tomcat6 配置cgi openlayers跨域访问
研二在公司实习一年
我现在在做的项目是关于GIS web 应用
目前主要是用openlayers + Geoserver来做
现在遇到如下情况:
openlayers框架是在satMCS工程中使用,用到的服务器是tomcat 6.0;localhost:8080
Geoserver部署在jetty 6.0的服务器上。localhost:8090
当openlayers通过WFS来访问Geoserver上的数据时,希望通过Ajax方式来获取数据
但是由于存在Ajax跨域调用问题:
则下面开始介绍如何在tomcat 6.0上部署cgi , 其目的很简单,就是为openlayers设置代理,实习跨域访问。
1.将openlayers中的proxy.cgi文件拷贝到Myeclipse新建工程目录下:(在工程目录WEB-INF下新建cgi文件夹,将其放入该文件夹下)
当然,首先你要将openlayers的几个文件夹和文件导入工程中
第一次使用OpenLayers:
先到它的官方网站http://www.openlayers.org下载相应压缩包,
解压后可以看到其中的一些目录和文件,拷贝目录下的OpenLayer.js、根目录下的lib目录、根目录下的img目录到你网站目录下
(只要保证OpenLayers.js,/lib,/img在同一目录中即可)

还需要对该文件进行修改:
allowedHosts = ['www.openlayers.org', 'openlayers.org',
                'labs.metacarta.com', 'world.freemap.in',
                'prototype.openmnnd.org', 'geo.openplans.org',
                'sigma.openplans.org', 'demo.opengeo.org',
                'www.openstreetmap.org', 'sample.azavea.com',
                'v2.suite.opengeo.org', 'v-swe.uni-muenster.de:8080',
                'vmap0.tiles.osgeo.org', 'www.openrouteservice.org',
                'maps.wien.gv.at','localhost:8090']
localhost:8090是添加的内容。该端口是Geoserver的服务器端口
注:proxy.cgi文件是在openlayer\example目录下可找到,需要自己去下载openlayers,我用到的是openlayers-2.12版本
2.修改tomcat的web.xml文件 (路径:D:\Program Files\Coding Software\Tomcat 6.0\conf)
<servlet>
        <servlet-name>cgi</servlet-name>
        <servlet-class>org.apache.catalina.servlets.CGIServlet</servlet-class>
        <init-param>
          <param-name>debug</param-name>
          <param-value>0</param-value>
        </init-param>
        <init-param>
          <param-name>cgiPathPrefix</param-name>
          <param-value>WEB-INF/cgi</param-value>
        </init-param>
        <init-param>
           <param-name>executable</param-name>
           <param-value>c:/Python27/python.exe</param-value>
       </init-param>
       <init-param>
           <param-name>passShellEnvironment</param-name>
           <param-value>true</param-value>
       </init-param>
         <load-on-startup>5</load-on-startup>
    </servlet>


  <!-- ================ Built In Servlet Mappings ========================= -->


  <!-- The servlet mappings for the built in servlets defined above.  Note  -->
  <!-- that, by default, the CGI and SSI servlets are *not* mapped.  You    -->
  <!-- must uncomment these mappings (or add them to your application's own -->
  <!-- web.xml deployment descriptor) to enable these services              -->

    <!-- The mapping for the default servlet -->
    <servlet-mapping>
        <servlet-name>default</servlet-name>
        <url-pattern>/</url-pattern>
    </servlet-mapping>
    <servlet-mapping>
        <servlet-name>cgi</servlet-name>
        <url-pattern>/cgi/*</url-pattern>
    </servlet-mapping>
注意:大部分内容web.xml文件中都存在,只是被其注释掉了,我们只需打开相应部分的注释代码,再加上部分代码。
另:
<init-param>
     <param-name>executable</param-name>
     <param-value>c:/Python27/python.exe</param-value>
</init-param>
这个部分,配置了python。主要是因为我们要让tomcat执行cgi脚本,则要配置该项目,告诉tomcat,让它调用python来执行脚本。
所以,读者还需要自己下载python2.7,并且安装在相应的目录下,最后,还得配置系统环境变量Path,当确定python配置成功之后,再往下看。
3.修改tomcat的context.xml文件(路径:D:\Program Files\Coding Software\Tomcat 6.0\conf)
<strong><Context privileged="true"></strong>

    <!-- Default set of monitored resources -->
    <WatchedResource>WEB-INF/web.xml</WatchedResource>

    <!-- Uncomment this to disable session persistence across Tomcat restarts -->
    <!--
    <Manager pathname="" />
    -->

    <!-- Uncomment this to enable Comet connection tacking (provides events
         on session expiration as well as webapp lifecycle) -->
    <!--
    <Valve className="org.apache.catalina.valves.CometConnectionManagerValve" />
    -->

</Context>
privileged=”true”部分是修改的地方。
4.将工程部署在tomcat 6.0上,测试以下是否可用。
输入如下网址:
http://localhost:8080/002_GISTest/cgi/proxy.cgi
红色是工程名
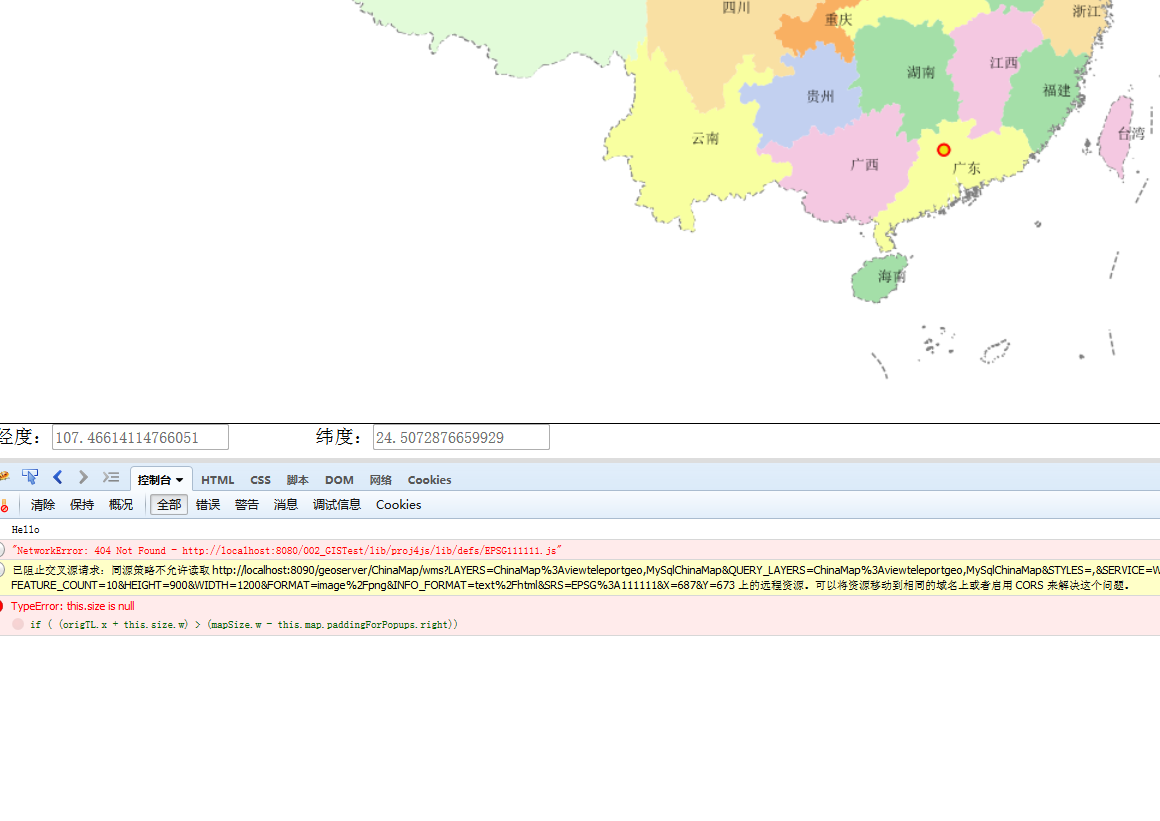
如果得到如下openlayers网页,则说明配置成功了。

到此为止,代理配置告一段落,接下来是利用此代理来达到openlayers跨域请求的目的。
下面还会持续更新。
本人还只是初次接触GIS开发,有误之处还望各位指点。
转载自:https://blog.csdn.net/Lin00Kun11/article/details/38865147

