1.部署一个简单的测试环境
测试geoserver REST接口,我们可使用python来测试,很方便。需要下载包:
python,http://python.org/。我下载的是Python27版本。
cURL,几个简单的命令行工具,很容易使用命令交互, 地址为http://curl.haxx.se/download.html,下载curl-7.53.1-win64-mingw版本。
Requests,一个给phtyon提供REST支持的插件,https://github.com/kennethreitz/requests。
三个包现在后,配置python的环境变量。打开Requests下载后的目录。在该目录下执行以下命令:
python setup.py install
~$ python
>>> import requests
2.使用curl获取工作区列表
解压curl下载包,进入目录“curl-7.53.1-win64-mingw\bin”,执行cmd命令。输入以下命令:
curl -u admin:geoserver -v -XGET -H 'Accept: text/xml' http://localhost:8082/geoserver/rest/workspaces -o E:\workspaces.xml
参数说明: -u表示验证的用户名和密码,-v表示输入版本, -X表示请求的方式,-H表示输入的请求头信息,-o打印输出文件。但实际不知道-o文件输出到哪里去了,没找到。 输出结果如下:
 3.使用python获取工作区
打开用于输出的一个目录,在该目录下执行cmd指令。分别一步一步执行以下python指令:
python
import requests
myUrl = 'http://localhost:8082/geoserver/rest/workspaces'
headers = {'Accept': 'text/xml'}
resp = requests.get(myUrl,auth=('admin','geoserver'),headers=headers)
resp.status_code
file = open('workspaces_py.xml','w')
file.write(resp.text)
file.close()
打开workspaces_py.xml文件查看输出结果。额curl输出结果一样。
4.查看工作区下的数据存储
指令和3相似,myUrl有点区别:myUrl = ‘http://localhost:8082/geoserver/rest/workspaces/tiger’。查询结果:
<workspace>
  <name>tiger</name>
  <dataStores>
    <atom:link xmlns:atom="http://www.w3.org/2005/Atom" rel="alternate" href="http://localhost:8082/geoserver/rest/workspaces/tiger/datastores.xml" type="application/xml"/>
  </dataStores>
  <coverageStores>
    <atom:link xmlns:atom="http://www.w3.org/2005/Atom" rel="alternate" href="http://localhost:8082/geoserver/rest/workspaces/tiger/coveragestores.xml" type="application/xml"/>
  </coverageStores>
  <wmsStores>
    <atom:link xmlns:atom="http://www.w3.org/2005/Atom" rel="alternate" href="http://localhost:8082/geoserver/rest/workspaces/tiger/wmsstores.xml" type="application/xml"/>
  </wmsStores>
</workspace>
5.查询命名空间
查询命名空间列表url:http://localhost:8082/geoserver/rest/namespaces。
查询某个具体的命名空间url:http://localhost:8080/geoserver/rest/namespaces/tiger。
6.创建命名空间
使用curl创建,指令如下:
curl -u admin:geoserver -XPOST -H 'Content-type: text/xml' -d '<namespace><prefix>newWorkspace</prefix><uri>http://geoserver.org</uri></namespace>' http://localhost:8082/geoserver/rest/namespaces
使用python创建,指令如下:
>>> myUrl = 'http://localhost:8082/geoserver/rest/namespaces'
>>> file = open('requestBody.xml','r')
>>> payload = file.read()
>>> headers = {'Content-type': 'text/xml'}
>>> resp = requests.post(myUrl, auth=('admin','geoserver'),data=payload, headers=headers)
>>> resp.status_code
requestBody.xml内容:
<namespace><prefix>newWorkspace</prefix><uri>http://geoserver.org</uri></namespace>
7.修改命名空间
使用python指令如下:
>>> myUrl = 'http://localhost:8082/geoserver/rest/namespaces/newWorkspace'
>>> file = open('requestBody.xml','r')
>>> payload = file.read()
>>> headers = {'Content-type': 'text/xml'}
>>> resp = requests.put(myUrl,auth=('admin','geoserver'),data=payload, headers=headers)
requestBody.xml内容:
<namespace><prefix>newWorkspace</prefix><uri>http://localhost:8082/geoserver</uri></namespace>
8.删除命名空间
使用python指令如下:
>>> myUrl = 'http://localhost:8082/geoserver/rest/workspaces/newWorkspace'
>>> headers = {'Accept': 'text/xml'}
>>> resp = requests.delete(myUrl, auth=('admin','geoserver'),headers=headers)
>>> resp.status_code
9.获取数据存储列表
使用python指令如下:
>>> myUrl = 'http://localhost:8082/geoserver/rest/workspaces/tiger/datastores'
>>> headers = {'Accept': 'text/xml'}
>>> resp = requests.get(myUrl,auth=('admin','geoserver'),headers=headers)
>>> file = open('tiger_datastores.xml','w')
>>> file.write(resp.text)
>>> file.close()
输出的tiger_datastores.xml内容如下:
<dataStores>
  <dataStore>
    <name>50m-rivers-lake-centerlines</name>
    <atom:link xmlns:atom="http://www.w3.org/2005/Atom" rel="alternate" href="http://localhost:8082/geoserver/rest/workspaces/tiger/datastores/50m-rivers-lake-centerlines.xml" type="application/xml"/>
  </dataStore>
  <dataStore>
    <name>ne_10m_railroads</name>
    <atom:link xmlns:atom="http://www.w3.org/2005/Atom" rel="alternate" href="http://localhost:8082/geoserver/rest/workspaces/tiger/datastores/ne_10m_railroads.xml" type="application/xml"/>
  </dataStore>
</dataStores>
10.获取某个存储的具体数据
使用python指令如下:
>>> myUrl = 'http://localhost:8082/geoserver/rest/workspaces/tiger/datastores/ne_50m_populated_places'
>>> headers = {'Accept': 'text/html'}
>>> resp = requests.get(myUrl,auth=('admin','geoserver'),headers=headers)
>>> file = open('tiger_ne_50m_populated_places_datastores.xml','w')
>>> file.write(resp.text)
>>> file.close()
输出结果如下:
<!DOCTYPE html PUBLIC "-//W3C//DTD XHTML 1.0 Transitional//EN"
    "http://www.w3.org/TR/xhtml1/DTD/xhtml1-transitional.dtd">
<html xmlns="http://www.w3.org/1999/xhtml" xml:lang="en" lang="en">
<head>
    <title>GeoServer Configuration</title>
    <meta name="ROBOTS" content="NOINDEX, NOFOLLOW"/>
</head>
<body>

Data Store "ne_50m_populated_places"
<ul>
  <li><a href="http://localhost:8082/geoserver/rest/workspaces/tiger/datastores/ne_50m_populated_places/featuretypes/ne_50m_populated_places.html">ne_50m_populated_places</a></li>
</ul>
</body>
</html>
11.添加数据存储
使用python指令如下:
>>> myUrl = 'http://localhost:8082/geoserver/rest/workspaces/tiger/datastores'
>>> file = open('tigerCounties.xml','r')
>>> payload = file.read()
>>> headers = {'Content-type': 'text/xml','Accept': 'text/xml'}
>>> resp = requests.post(myUrl, auth=('admin','geoserver'),data=payload, headers=headers)
>>> resp.status_code
传递的tigerConties.xml内容如下:
<dataStore>
    <name>tl_2011_47_concity_REST</name>
    <description>tiger counties created from REST</description>
    <!-- 上传数据存储的类型 -->
    <type>Shapefile</type>
    <!-- 数据存储是否可用-->
    <enabled>true</enabled>
    <connectionParameters>
        <!-- 使用内存映射的缓冲区 -->
        <entry key="memory mapped buffer">false</entry>
        <!-- 如果缺少空间索引或者空间索引过时,重新建立空间索引 -->
        <entry key="create spatial index">true</entry>
        <!-- DBF的字符集 -->
        <entry key="charset">ISO-8859-1</entry>
        <!-- 数据文件类型 -->
        <entry key="filetype">shapefile</entry>
        <!-- 如果缺少空间索引或者空间索引过时,重新建立空间索引 -->
        <entry key="cache and reuse memory maps">true</entry>
        <!-- 上传数据文件的路径 -->
        <entry key="url">E:\ebook\GeoServer_Beginners+Guide\output\tl_2011_47_concity\tl_2011_47_concity.shp</entry>
        <entry key="namespace">http://www.census.gov</entry>
    </connectionParameters>
    <__default>false</__default>
</dataStore>
12.修改数据存储
和新增数据存储相似,配置文件tigerCounties.xml修改后。上传该文件,提交使用“PUT”方式。
resp = requests.put(myUrl, auth=('admin','geoserver'),data=payload, headers=headers)
13.删除数据存储
使用python指令如下:
>>> myUrl = 'http://localhost:8082/geoserver/rest/workspaces/tiger/datastores/tl_2011_47_concity_REST'
>>> headers = {'Accept': 'text/xml'}
>>> resp = requests.delete(myUrl, auth=('admin','geoserver'),headers=headers)
14.使用put方式增加shapefile文件
这种方式是直接把shapfile文件上传到geoserver服务器上,所有必须是*.zip包。使用python命令如下:
>>> myUrl = 'http://localhost:8082/geoserver/rest/workspaces/tiger/datastores/Natural+Earth+Countries/file.shp'
>>> file = open('110m-admin-0-countries.zip','rb')
>>> payload = file.read()
>>> headers = {'Content-type': 'application/zip'}
>>> resp = requests.put(myUrl, auth=('admin','geoserver'),data=payload, headers=headers)
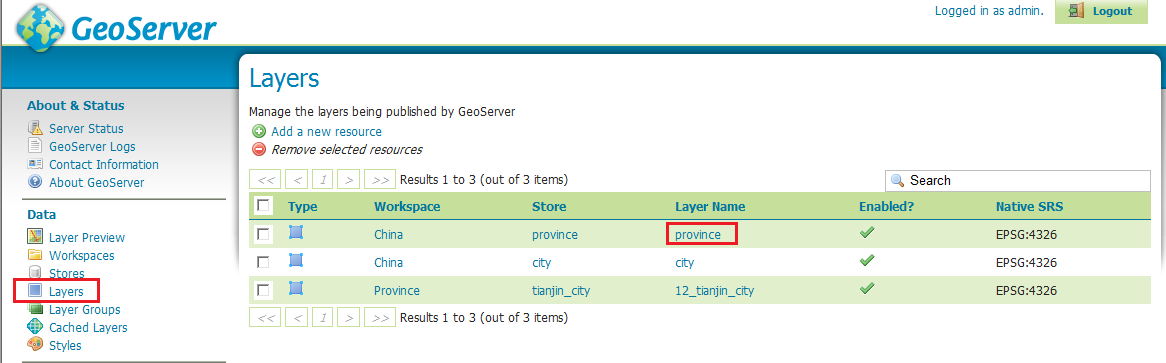
“Natural+Earth+Countries”表示数据存储名字为“Natural Earth Countries”;url中的file.shpe是指上传到服务器上存储的shape文件名字;“110m-admin-0-countries.zip”即是需要上传的shape文件压缩包。上传过后,可以在geoserver服务界面查看文件路径:

对应的物理路径在geoserver安装目录下的data目录下。
15.把PostGIS中的一个表添加到一个图层
之前在工作空间cite有创建过一个PostGIS的数据存储,叫做myPostGIS。假如我们已经在PostgreSQL数据库中增加了一个表“ne_110m_admin”,现在我想把表映射到数据存储myPostGIS下的一个图层。
使用python指令如下:
>>> myUrl = 'http://localhost:8082/geoserver/rest/workspaces/cite/datastores/myPostGIS/featuretypes'
>>> payload = '<featureType><name>ne_110m_admin</name></featureType>'
>>> headers = {'Content-type': 'text/xml'}
>>> resp = requests.post(myUrl, auth=('admin','geoserver'),data=payload, headers=headers)
以上命令执行后,可在图层列表总看到一个新的图层“ne_110m_admin”。

如果我们想增加更多的图层配置,例如显示名称“name”、唯一标示名称“nativeName”、keywords包含表字段。如下:
<featureType>
    <name>World boundaries</name>
    <nativeName>ne_110m_admin</nativeName>
    <title>World boundaries</title>
    <abstract>World administrative boundaries at small scale</abstract>
    <keywords>
        <string>Political</string>
        <string>World</string>
    </keywords>
<featureType>
如果我们想创建一个新表,可以在配置信息中配置表的字段、srs等。例如:
<featureType>
    <name>rivers</name>
    <nativeName>rivers</nativeName>
    <title>World River</title>
    <srs>EPSG:4326</srs>
    <attributes>
        <attribute>
            <name>geom</name>
            <binding>com.vividsolutions.jts.geom.Polyline</binding>
        </attribute>
        <attribute>
            <name>name</name>
            <binding>java.lang.String</binding>
            <length>30</length>
        </attribute>
        <attribute>
            <name>country_code</name>
            <binding>java.lang.String</binding>
            <length>8</length>
        </attribute>
    </attributes>
</featureType>
16.查询样式
使用python指令如下:
>>> myUrl = 'http://localhost:8082/geoserver/rest/styles/PopulatedPlacesLabeled'
>>> headers = {'Accept: application/vnd.ogc.sld+xml'}
>>> resp = requests.get(myUrl, auth=('admin','geoserver'),headers=headers)
>>> file = open('PopulatedPlacesBlueLabeled.xml','w')
>>> file.write(resp.text)
>>> file.close()
17.新增样式
使用python指令如下:
>>> myUrl = 'http://localhost:8082/geoserver/rest/styles'
>>> file = open('PopulatedPlacesBlueLabeled.xml','r')
>>> payload = file.read()
>>> headers = {'Content-type': 'application/vnd.ogc.sld+xml'}
>>> resp = requests.post(myUrl, auth=('admin','geoserver'),data=payload, headers=headers)
18.所有REST接口查询地址
http://docs.geoserver.org/stable/en/user/rest/api/styles.html#rest-api-styles-post-put
19.查询WFS服务的能力
使用ptyhon指令如下:
myUrl = 'http://localhost:8082/geoserver/wfs?service=wfs&version=1.0.0&request=GetCapabilities'
headers = {'Accept': 'text/xml'}
resp = requests.get(myUrl,auth=('admin','geoserver'),headers=headers)
resp.status_code
file = open('getCapabilities.xml','w')
file.write(resp.text)
file.close()
查看getCapabilities.xml文件,内容比较多,包含了所有的图层信息FeatureType。FeatureType部分内容如下:
<FeatureType>
<Name>NaturalEarth:10m_railroads</Name>
<Title>10m_railroads</Title>
<Abstract/>
<Keywords>10m_railroads, features</Keywords>
<SRS>EPSG:4326</SRS>
<LatLongBoundingBox minx="-150.08159339101002"
miny="8.329046942181577" maxx="-59.94810950429127"
maxy="64.93097565311908"/>
</FeatureType>
20.查询featureType的完整描述
使用python指令如下:
myUrl = "http://localhost:8082/geoserver/wfs?
service=wfs&version=1.0.0&request=DescribeFeatureType&TypeName=tiger:tiger_roads"
headers = {'Accept': 'text/xml'}
resp = requests.get(myUrl,auth=('admin','geoserver'),headers=headers)
resp.status_code
file = open('tiger_roads.xml','w')
file.write(resp.text)
file.close()
查看getFeature.xml文件,内容如下:
<?xml version="1.0" encoding="UTF-8"?><xsd:schema xmlns:gml="http://www.opengis.net/gml"

xmlns:tiger="http://www.census.gov" xmlns:xsd="http://www.w3.org/2001/XMLSchema"

elementFormDefault="qualified" targetNamespace="http://www.census.gov"> <xsd:import

namespace="http://www.opengis.net/gml"

schemaLocation="http://localhost:8082/geoserver/schemas/gml/2.1.2/feature.xsd"/> <xsd:complexType

name="tiger_roadsType"> <xsd:complexContent> <xsd:extension base="gml:AbstractFeatureType">

<xsd:sequence> <xsd:element maxOccurs="1" minOccurs="0" name="the_geom" nillable="true"

type="gml:MultiLineStringPropertyType"/> <xsd:element maxOccurs="1" minOccurs="0" name="CFCC"

nillable="true" type="xsd:string"/> <xsd:element maxOccurs="1" minOccurs="0" name="NAME"

nillable="true" type="xsd:string"/> </xsd:sequence> </xsd:extension> </xsd:complexContent>

</xsd:complexType> <xsd:element name="tiger_roads" substitutionGroup="gml:_Feature"

type="tiger:tiger_roadsType"/></xsd:schema>
21.查看featureType的数据
使用python指令如下:
myUrl = "http://localhost:8082/geoserver/wfs?
service=wfs&version=1.1.0&request=GetFeature&TypeName=tiger:tiger_roads&maxFeatures=1"
headers = {'Accept': 'text/xml'}
resp = requests.get(myUrl,auth=('admin','geoserver'),headers=headers)
resp.status_code
file = open('getFeature.xml','w')
file.write(resp.text)
file.close()
maxFeaturres参数指定参数feature的条数,这里只查询了一条。有时候我们还需要一些额外的空间属性过滤条件。例如可以使用bbox参数设置查询边界。
"http://localhost:8082/geoserver/wfs?service=wfs&version=1.0.0&request=GetFeature&TypeName=tiger_roads&bbox=-116.68,36.29,-111.36,39.90"
返回数据格式如下:
<wfs:FeatureCollection
…
>
<gml:boundedBy>
<gml:null>unknown</gml:null>
</gml:boundedBy>
<gml:featureMember>
<NaturalEarth:10m_railroads fid="10m_railroads.481">
<NaturalEarth:the_geom>
<gml:MultiLineString srsName="http://www.opengis.
net/gml/srs/epsg.xml#4326">
<gml:lineStringMember>
<gml:LineString>
<gml:coordinates xmlns:gml="http://
www.opengis.net/gml" decimal="." cs="," ts=" ">-
116.86064613,34.86170075 -116.85924232,34.86536286
...
-112.16722572,40.70233796
-112.15178382,40.70752595</gml:coordinates>
</gml:LineString>
</gml:lineStringMember>
</gml:MultiLineString>
</NaturalEarth:the_geom>
<NaturalEarth:ScaleRank>8</NaturalEarth:ScaleRank>
<NaturalEarth:FeatureCla>Railroad</
NaturalEarth:FeatureCla>
<NaturalEarth:SOV_A3>USA</NaturalEarth:SOV_A3>
<NaturalEarth:UIDENT>49706</NaturalEarth:UIDENT>
</NaturalEarth:10m_railroads>
</gml:featureMember>
</wfs:FeatureCollection>
22.查询WCS服务能力
使用ptyhon指令如下:
myUrl = "http://localhost:8082/geoserver/wcs?service=wcs&version=1.0.0&request=GetCapabilities"
headers = {'Accept': 'text/xml'}
resp = requests.get(myUrl,auth=('admin','geoserver'),headers=headers)
file = open('getCapabilities.xml','w')
file.write(resp.text)
file.close()
返回结果包含了每个coverage影像的描述信息。nurc:Img_Sample影像的描述信息如下:
<wcs:CoverageOfferingBrief>
<wcs:description>A very rough imagery of North America</
wcs:description>
<wcs:name>nurc:Img_Sample</wcs:name>
<wcs:label>North America sample imagery</wcs:label>
<wcs:lonLatEnvelope srsName="urn:ogc:def:crs:OGC:1.3:CRS84">
<gml:pos>-130.85168 20.7052</gml:pos>
<gml:pos>-62.0054 54.1141</gml:pos>
</wcs:lonLatEnvelope>
<wcs:keywords>
<wcs:keyword>WCS</wcs:keyword>
<wcs:keyword>worldImageSample</wcs:keyword>
<wcs:keyword>worldImageSample_Coverage</wcs:keyword>
</wcs:keywords>
</wcs:CoverageOfferingBrief>
23.查询WCS某个图层的详细描述
使用python指令如下:
myUrl ="http://localhost:8082/geoserver/wcs?
service=wcs&version=1.0.0&request=DescribeCoverage&Coverage=nurc:Img_Sample"
headers = {'Accept': 'image/tiff'}
resp = requests.get(myUrl,auth=('admin','geoserver'),headers=headers)
file = open('describeCoverage.xml','w')
file.write(resp.text)
file.close()
返回结果包含了该图层的详细描述。
24.查看WCS图层的数据
查询影响图层数据,必须传递bbox、width以及height参数。使用python指如下:
myUrl = "http://localhost:8082/geoserver/wcs?
service=wcs&version=1.0.0&request=GetCoverage&coverage=nurc:Img_Sample&crs=EPSG:4326&bbox=-
130.85168,20.7052,-62.0054,54.1141&width=982&height=597&format=geotiff&bands=1"
headers = {'Accept': 'text/xml'}
resp = requests.get(myUrl,auth=('admin','geoserver'),headers=headers)
file = open('coverage.tiff','w')
file.write(resp.text)
file.close()
查询结果返回一个tiff格式的图片文件。