
【GIS】——Tilestache在windows上的安装
目录
GIS技术栈的东西真不少,感觉乱糟糟一片。不过,在查资料和零零碎碎时间学习当中,渐渐对这块内容有了些眉目。
前段时间,刚刚了解了一下OpenLayers。OpenLayers作为前端地图框架,主要起到展现地图数据给用户,以及接收用户的交互请求,比如在地图上用线条勾出一块区域。
今天要介绍的Tilestache它相当于一个后端的Server,前端OpenLayer向其发送获取地图数据的HTTP请求。
安装步骤
Tilestache是基于Python的,所以首先安装Python,再安装Tilestache。
1.官网下载–>安装–>配置环境变量–>检查是否安装成功
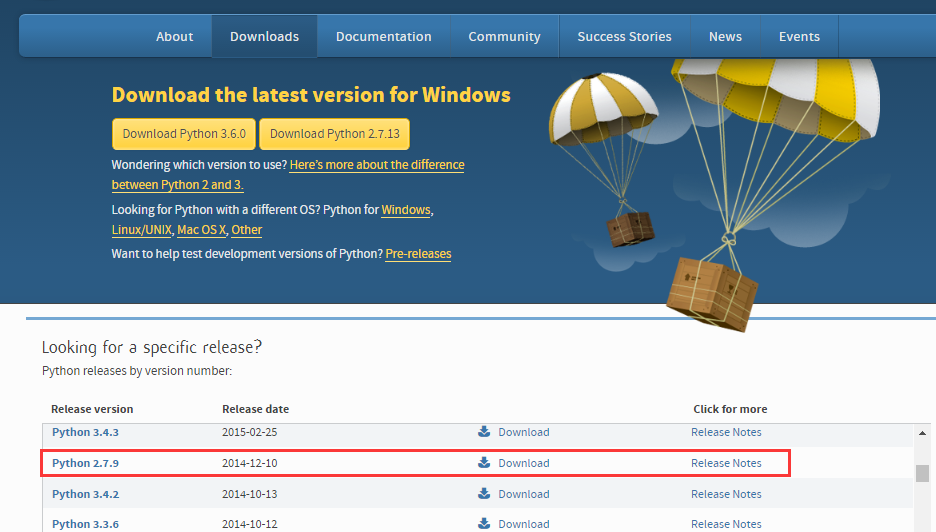
(1)下载地址:https://www.python.org/downloads/
我下载的是Python2.7.9 ,64位的
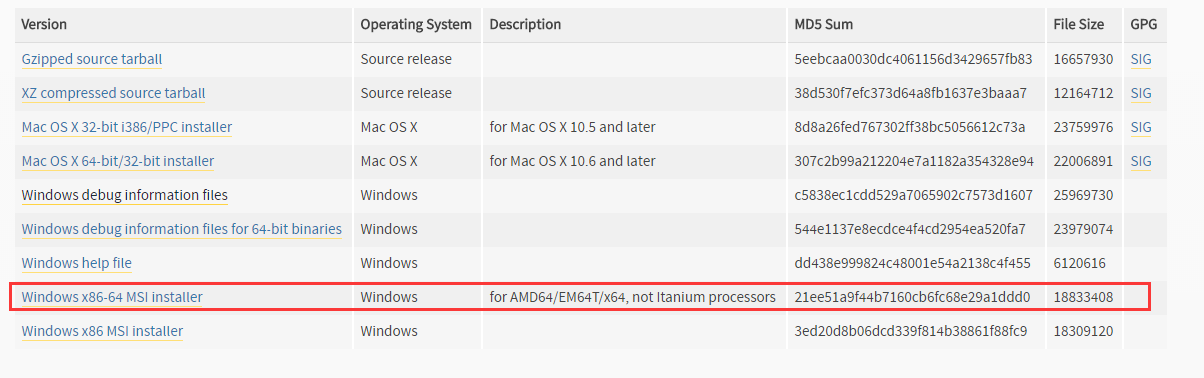
(2)直接打开python-2.7.9.amd64.msi,安装即可。我的安装路径为:D:\Python27
(3)配置环境变量
新建PYTHON_HOME 变量
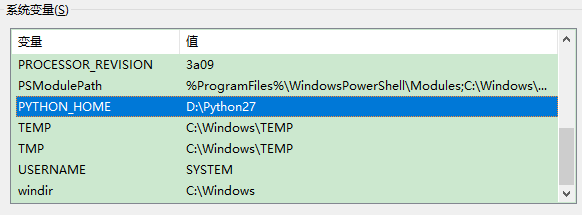
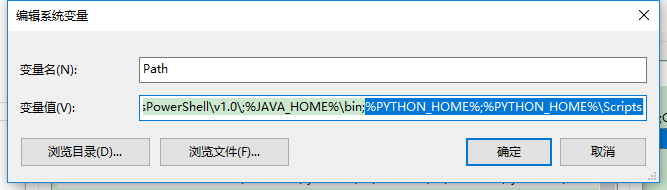
然后将%PYTHON_HOME%;
%PYTHON_HOME%\Scripts添加到Path中
(4)打开命令窗口,输入python,显示如下信息,则安装成功。

2.下载Tilestache,安装,运行
(1)打开官网,找到下载地址入口
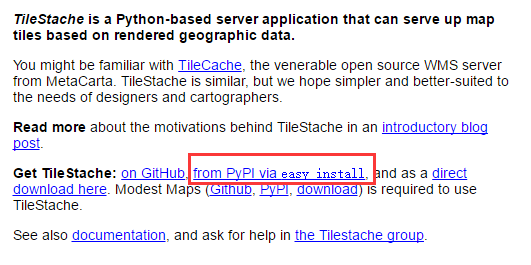
https://pypi.python.org/pypi/TileStache
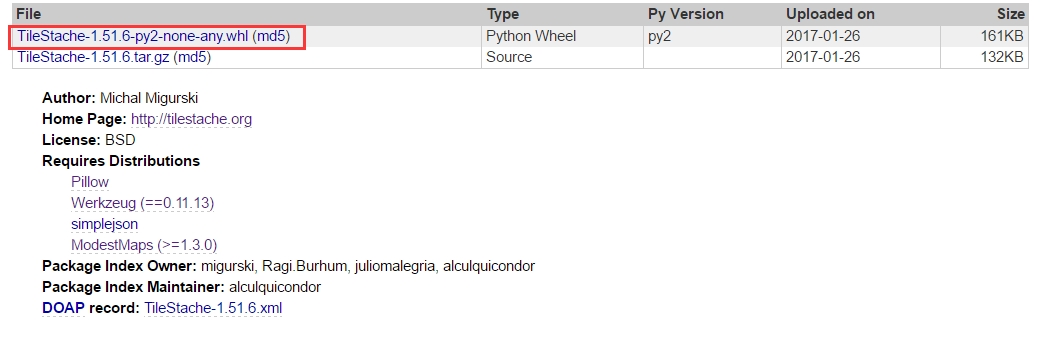
(2)安装下载好的文件TileStache-1.51.6-py2-none-any.whl
这是我第一次安装这种类型的文件,开始并不知道怎么安装,上网搜了一下。
在安装这个文件之前首先需要安装wheel。
打开命令窗口,输入
pip install wheel然后在.whl文件所在的目录,用管理员打开一个命令窗口,直接执行下面的语句:
pip install TileStache-1.51.6-py2-none-any.whl(3)然后在D:\Python27\Scripts目录下,会出现tilestache-server.py 文件,在这个目录中打开命令窗口,输入
python tilestache-server.py结果出现了许多错误:
No module named werkzeug.serving
解决时在命令窗口中输入以下命令就可以了。
pip install werkzeugNo module named ModestMaps.Core:
pip install ModestMapsNo module named Image:
easy_install Pillow(4)不再有错误时,会提示你输入-c 加载配置文件来运行Tilestache。
我的配置文件名为tilestache.cfg,保存为utf8格式。放在和tilestache-server.py同一个目录下
{
    "_comment":"tilestache.cfg包含两个顶级元素,分别实现缓存、图层的配置",
    "cache":
    {
     "name":"Disk",
     "path":"/tmp/tilescache",
     "umask": "0000"
    },
    "layers":
    {
         "osm":
        {
          "provider":{"name":"proxy","provider":"OPENSTREETMAP"}
        }
    }
}
然后在命令窗口输入
python tilestache-server.py -c tilestache.cfg出现提示:
Running on http://127.0.0.1:8080/ (Press CTRL+C to quit)
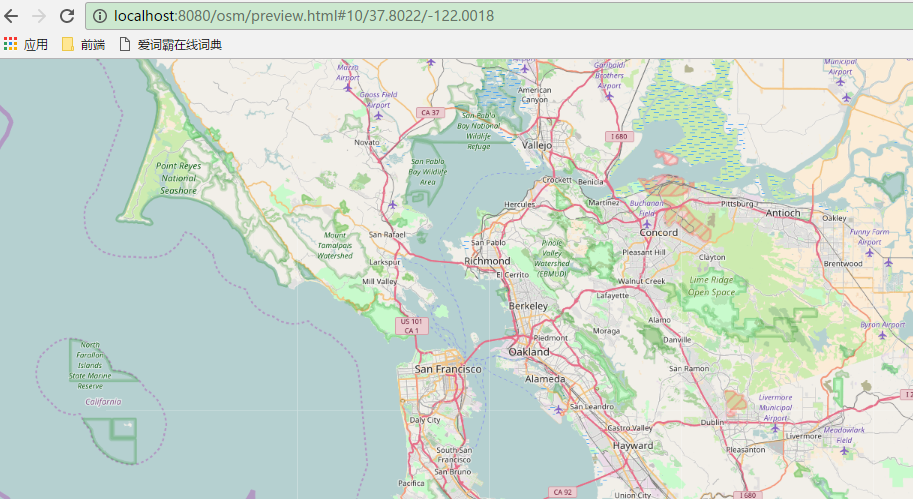
(5)打开浏览器,输入http://localhost:8080/osm/preview.html
(6)如果8080端口被占用,则会报如下错误:
Traceback (most recent call last):
  File "tilestache-server.py", line 56, in <module>
    run_simple(options.ip, options.port, app)
  File "D:\Python27\lib\site-packages\werkzeug\serving.py", line 708, in run_simple
    inner()
  File "D:\Python27\lib\site-packages\werkzeug\serving.py", line 670, in inner
    fd=fd)
  File "D:\Python27\lib\site-packages\werkzeug\serving.py", line 564, in make_serve
    passthrough_errors, ssl_context, fd=fd)
  File "D:\Python27\lib\site-packages\werkzeug\serving.py", line 476, in __init__
    HTTPServer.__init__(self, (host, int(port)), handler)
  File "D:\Python27\lib\SocketServer.py", line 420, in __init__
    self.server_bind()
  File "D:\Python27\lib\BaseHTTPServer.py", line 108, in server_bind
    SocketServer.TCPServer.server_bind(self)
  File "D:\Python27\lib\SocketServer.py", line 434, in server_bind
    self.socket.bind(self.server_address)
  File "D:\Python27\lib\socket.py", line 224, in meth
    return getattr(self._sock,name)(*args)
socket.error: [Errno 10013]
此时在命令窗口输入下面的命令来修改端口号
python tilestache-server.py -p 8016我是参考了它的官方文档:http://tilestache.org/doc/
首战告捷!!!!
更新
因为后面安装32bit的mapnik,所以又重新安装32bit的python,和Tilestache。发现pip install werkzeug会报错:
AssertionError: Multiple .dist-info directories
所以改成easy_install werkzeug了。下面的也变成easy_install ModestMaps
参考文章
windows7下怎样安装whl文件(python)
https://github.com/TileStache/TileStache
基于OpenStreetMap的地图服务器的搭建
win7搭建openStreetMap地图
转载自:https://blog.csdn.net/u010924834/article/details/54988196


